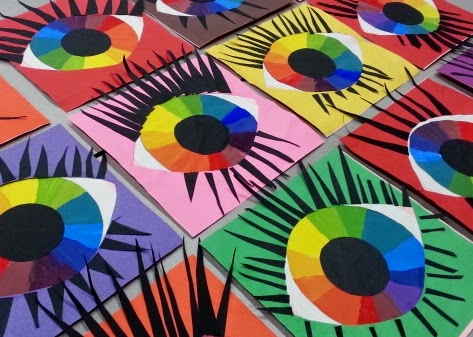
5th graders created color wheel eyeballs!
First students labeled and colored a worksheet identifying the proper organization of a color wheel. Then students used rulers to evenly divide their square paper into 12 equal sections. After labeling each section, students began painting their color wheels using the primary colors first, then the secondary colors, an ending with the intermediate colors. After their papers dried, students constructed their eyeball using a large white circle as the eyeball, the color wheel as the iris, and a small black circle for the pupil. Students then chose a “skin” color, glued it on top and finished their project by adding black eyelashes.


This is really a fun way to present a color wheel. May I steal your idea?
ReplyDeleteThank you, the kids enjoyed it. Feel free to use it.
DeleteI would love to do this with my students. However, I'm really bad at math. Can you explain how you measured out the 12 sections for the color wheel?
DeleteHope this helps...
Deletehttp://jamestownart.blogspot.com/p/eye-ball-how-to.html
How clever!
ReplyDeleteWhere could I get a color wheel worksheet this size? Do you have one to download or on Teachers Pay Teachers? Appreciate it!
Sorry I missed your comment earlier. I do not have a TPT account, but maybe this will help...
Deletehttp://jamestownart.blogspot.com/p/eye-ball-how-to.html
love it :)
ReplyDeleteThanks ! Brilliant lesson with special needs group here in Bali ....great fun ! ��
ReplyDeletethat is a really great way for students to express their artistry
ReplyDeleteThis is one of the most inspirational fun art i have ever seen. Thanks so much for sharing this 😊
ReplyDelete